 We recently needed a quick and easy web server for internal development and testing. I decided to use CentOS as we have a few root servers with 1&1 which run the same Linux version, CentOS also comes pre-installed with Yum which is a feature that allows you to download and install software easily from the command line.
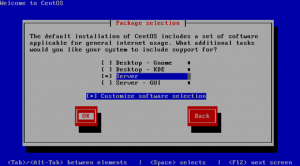
Installing CentOS was simple, and after choosing the command line server version, deselecting all additional packages – the install only took a few minutes… Infact, it took longer to download the ISO’s than it did to install the OS!
After the CentOS 5.5 Install :
— Update all the OS bits using yum (read more on yum)
yum update
— Install the Web server bits
yum install php php-mysql mysql-server php-gd postgres ImageMagick ImageMagick-devel
— Now add a test file to the root of HTML files we will us “http://www.basicconfig.com/linux/vi” (read more on vi)
vi /var/www/html/index.php
Press “i” to start inserting test into your new file, type “<? phpinfo(); ?>” to allow us to check that PHP is up and running. Finish your file by returning to vi command by pressing “esc” then write and quit by typing “:wq”
— To find the IP of your server (if provided by DHCP) to allow us to browse from our network
ifconfig | grep "inet addr"
— In your browser window, visit your web servers internal IP – you should see a PHP Info readout
eg : http://192.168.99.10/index.php
— Now start the MySQL service
service mysqld start
— The service should start and display “OK” when it has, set a root password
/usr/bin/mysqladmin -u root password 'mynewpassword'
And that’s pretty much it. If you want to access the server without being on the server itself, you can access with SSH / SFTP / etc – and of course if you want to expose your server to the outside world, you can forward web traffic to the static IP of your web server.
